
Prêt pour l’action? 🏒
Assemble ton nouveau jeu en un rien de temps ! Suis attentivement les étapes ci-dessous pour t'assurer que tout est en place. Prépare-toi à relever des défis, à t'amuser et à marquer des points à chaque tour.!
Étapes pour ajouter ton image de gardien

préparation du gardien
Décollez la pellicule protectrice du gardien.

Préparation de la photo
Choisissez une photo où votre visage avec une expression amusante.
Utilisez le gabarit fourni pour découper votre visage avec précision, en suivant le contour indiqué. Assurez-vous que la taille correspond bien à l’espace du masque.

Appliquez l’image sur l'autocollant
Placez la découpe de votre visage sur l’autocollant noir, ce qui donnera un contour net et professionnel à votre image.

Retirez la pellicule de protection
Décoller soigneusement la pellicule protectrice de l’autocollant pour préparer l’application sur le masque.

Positionnez l'image sur le masque
Alignez l’image avec la zone prévue sur le masque du gardien et appuyez fermement pour bien la fixer.

Lissez et ajustez
Passez doucement vos doigts sur les bords de l’image pour éliminer toute bulle d’air et assurer un rendu lisse et réaliste.
Assemblage du but et panneau

Étape 1
Retirer les boulons
Dévissez les deux boulons situés au-dessus du cadre.
Vous pouvez les retirer à la main si ce n’est pas trop serré, sinon utilisez l'outill fourni.

Étape 2
Positionner le gardien
Retirez la section du cadre sur laquelle est fixé le filet. Mettez cette partie de côté le temps d’installer le gardien.
Prenez le gardien de but. Placez-le devant la structure en alignant les trous latéraux du panneau avec ceux du cadre métallique.

Étape 3
Fixer le gardien au cadre
Insérez les vis dans les trous du gardien et du cadre. Vissez-les avec un tournevis étoile (idéal) ou un tournevis carré.
Astuce : tirez légèrement sur les côtés du cadre pour mieux aligner les trous si nécessaire.

Étape 4
Remettre les boulons
Replacez les boulons avec leurs rondelles dans les emplacements d’origine.
Alternez avec les rondelles et la structure.

Étape 5
Remettre les boulons (2)
Vissez-les jusqu’au fond. Un serrage modéré suffit : inutile de trop forcer.
utilisation de la goupille
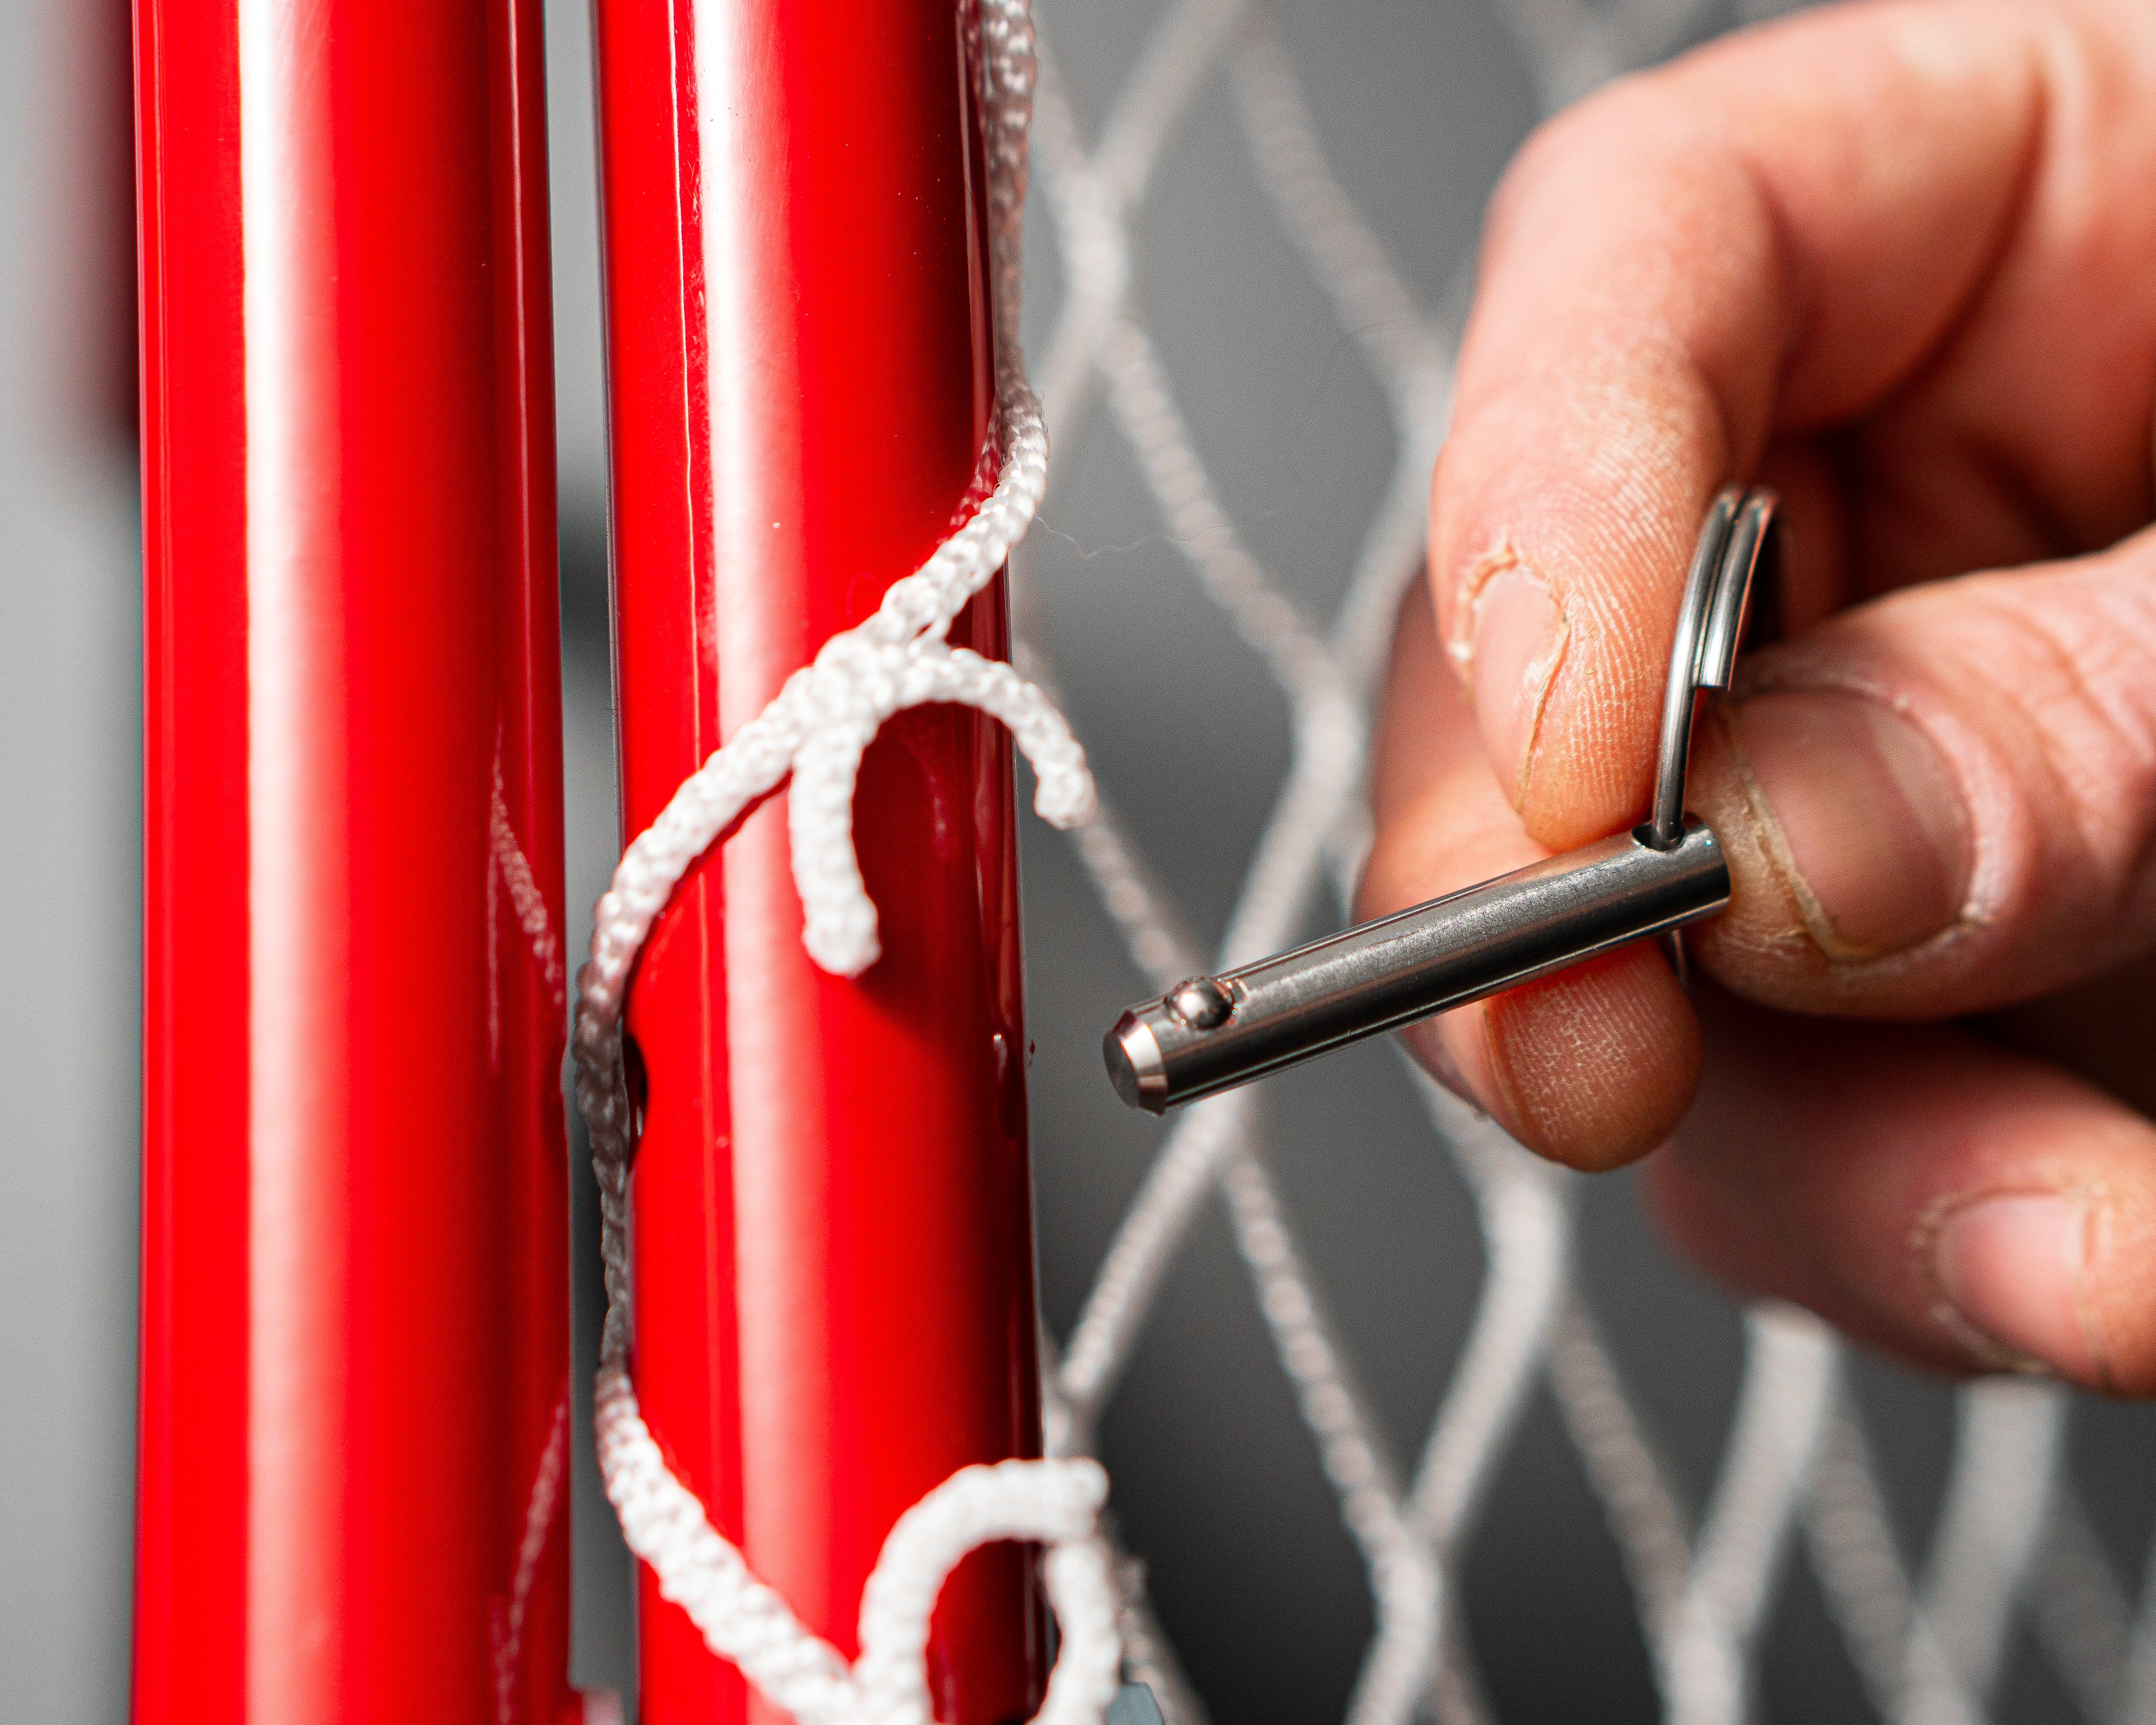
Retirez la goupille pour le transport
Pour plier le jeu et le ranger, retirez simplement la goupille.
Assurez-vous de bien la conserver pour éviter de la perdre.
Astuce pratique :
Accrochez la goupille à votre trousseau de clés ou glissez-la dans les mailles du filet afin de toujours l’avoir sous la main.
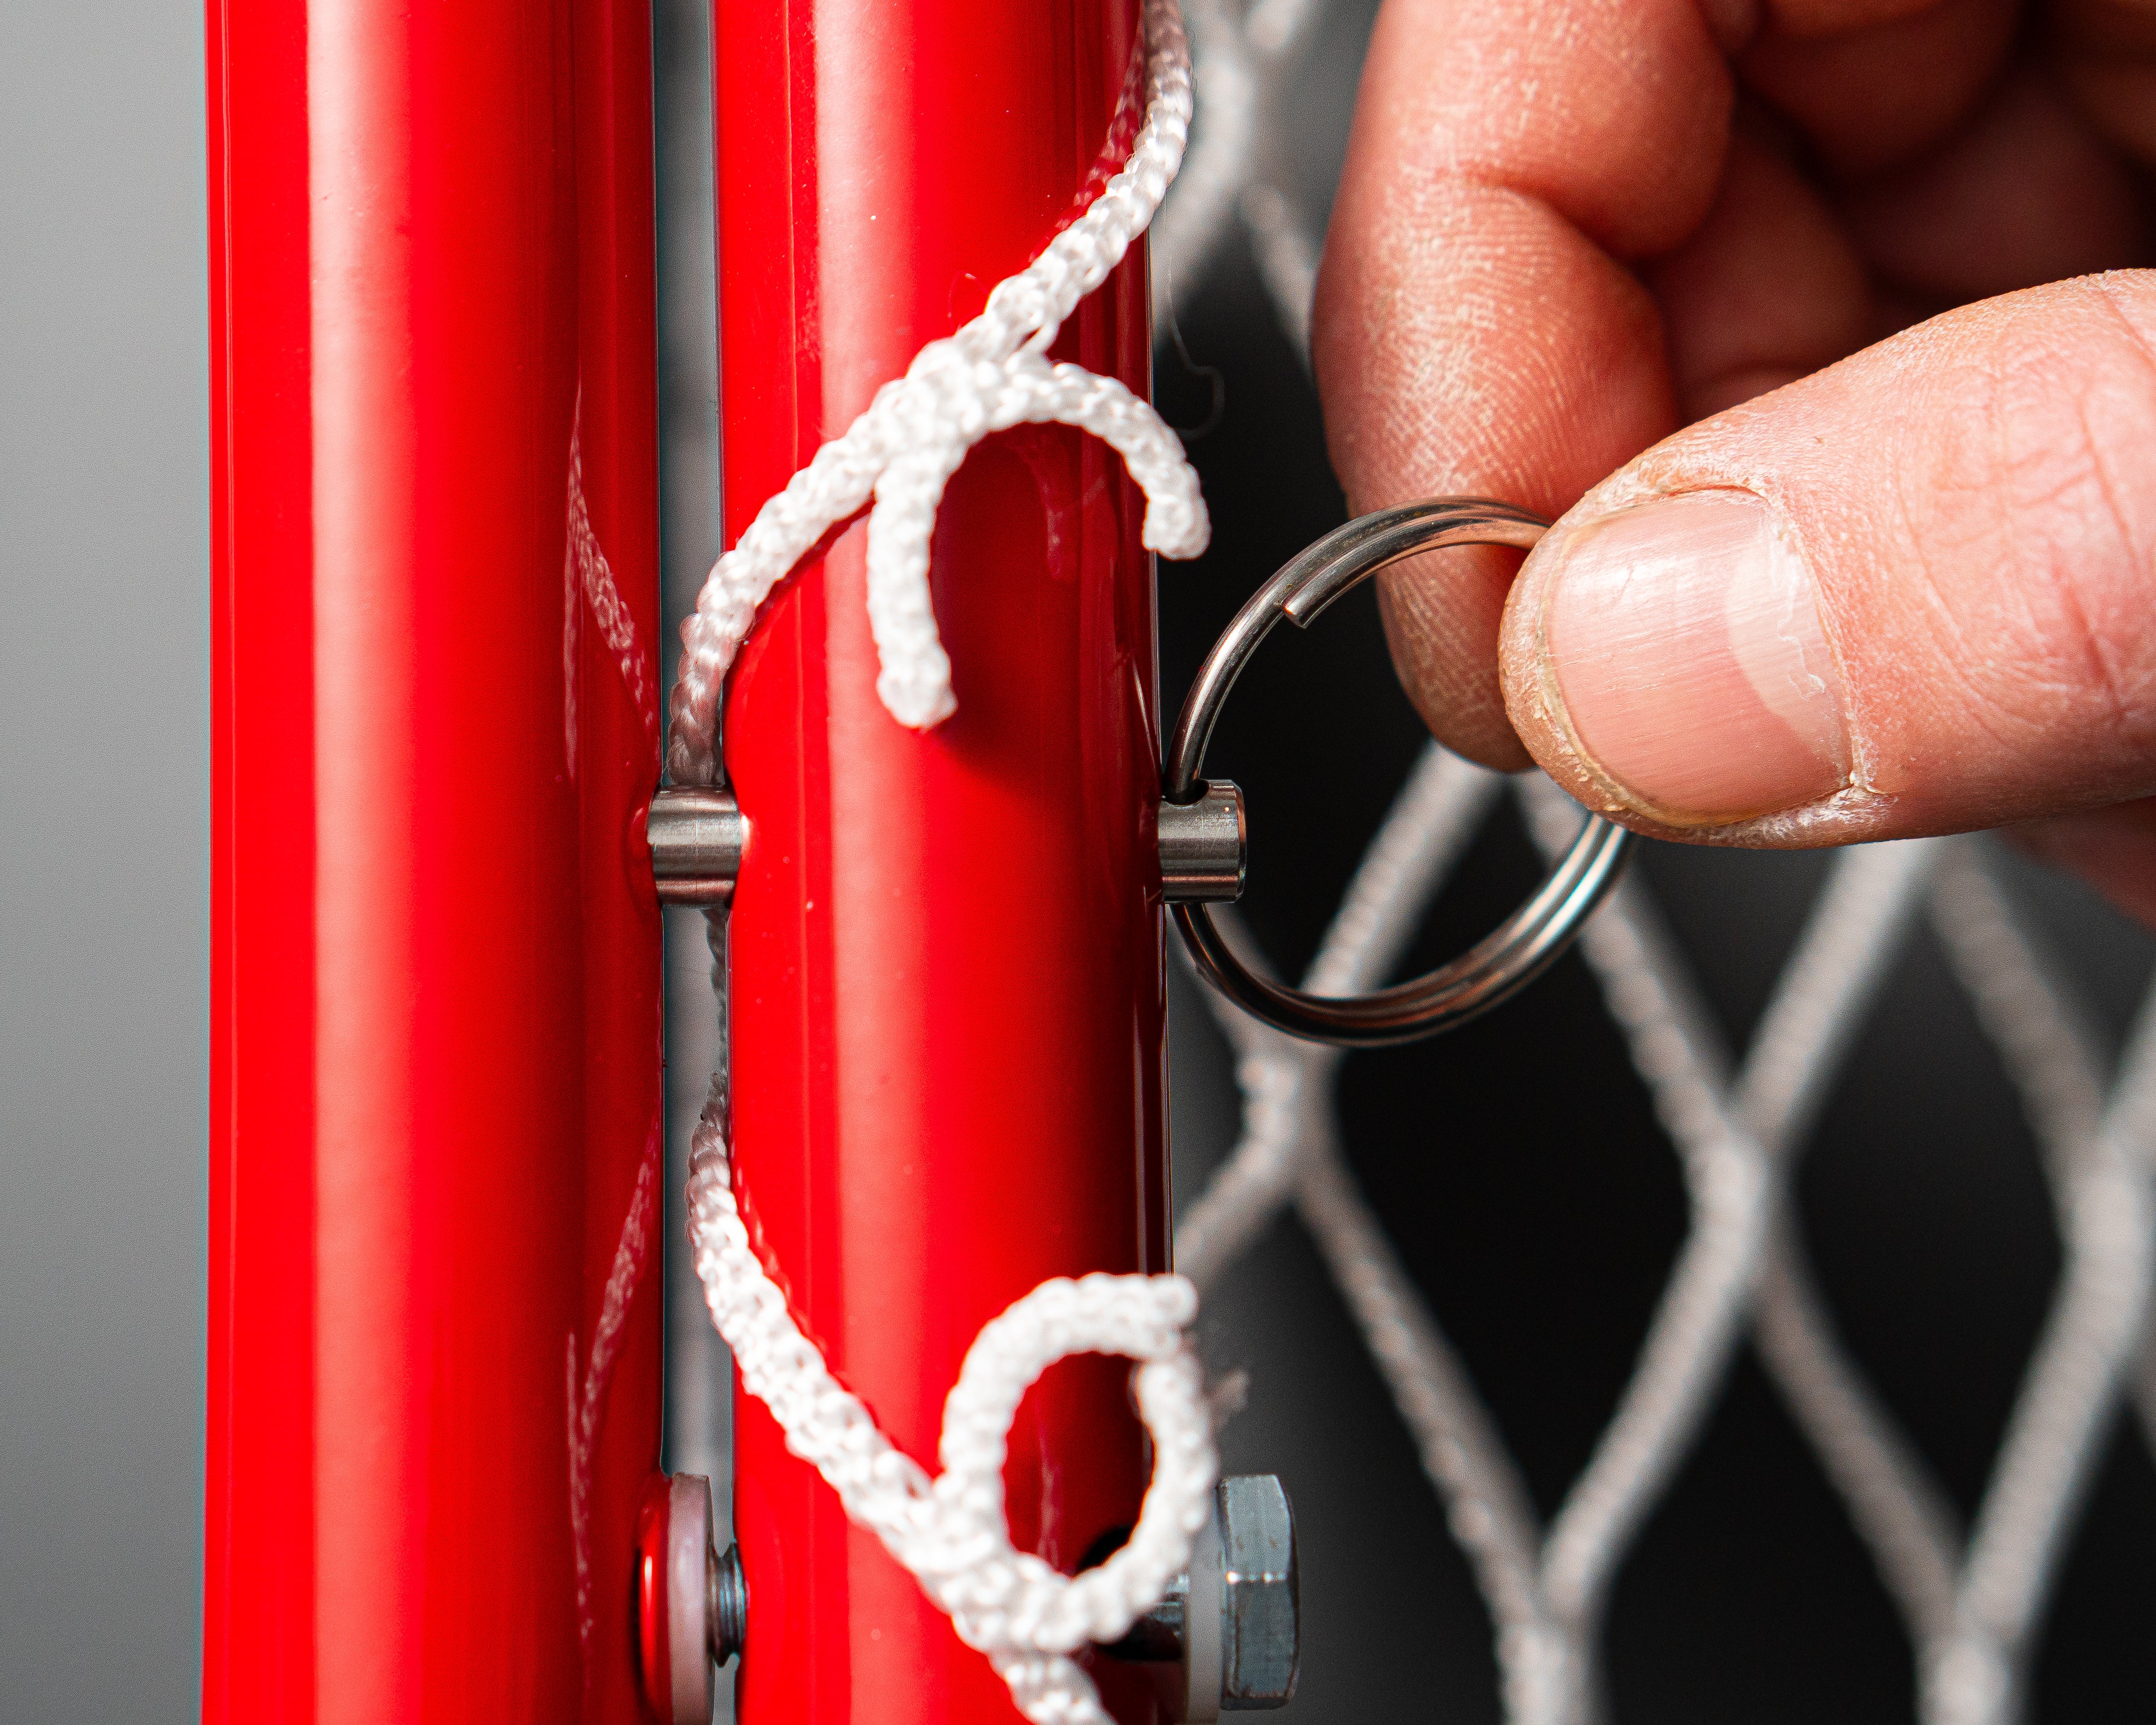
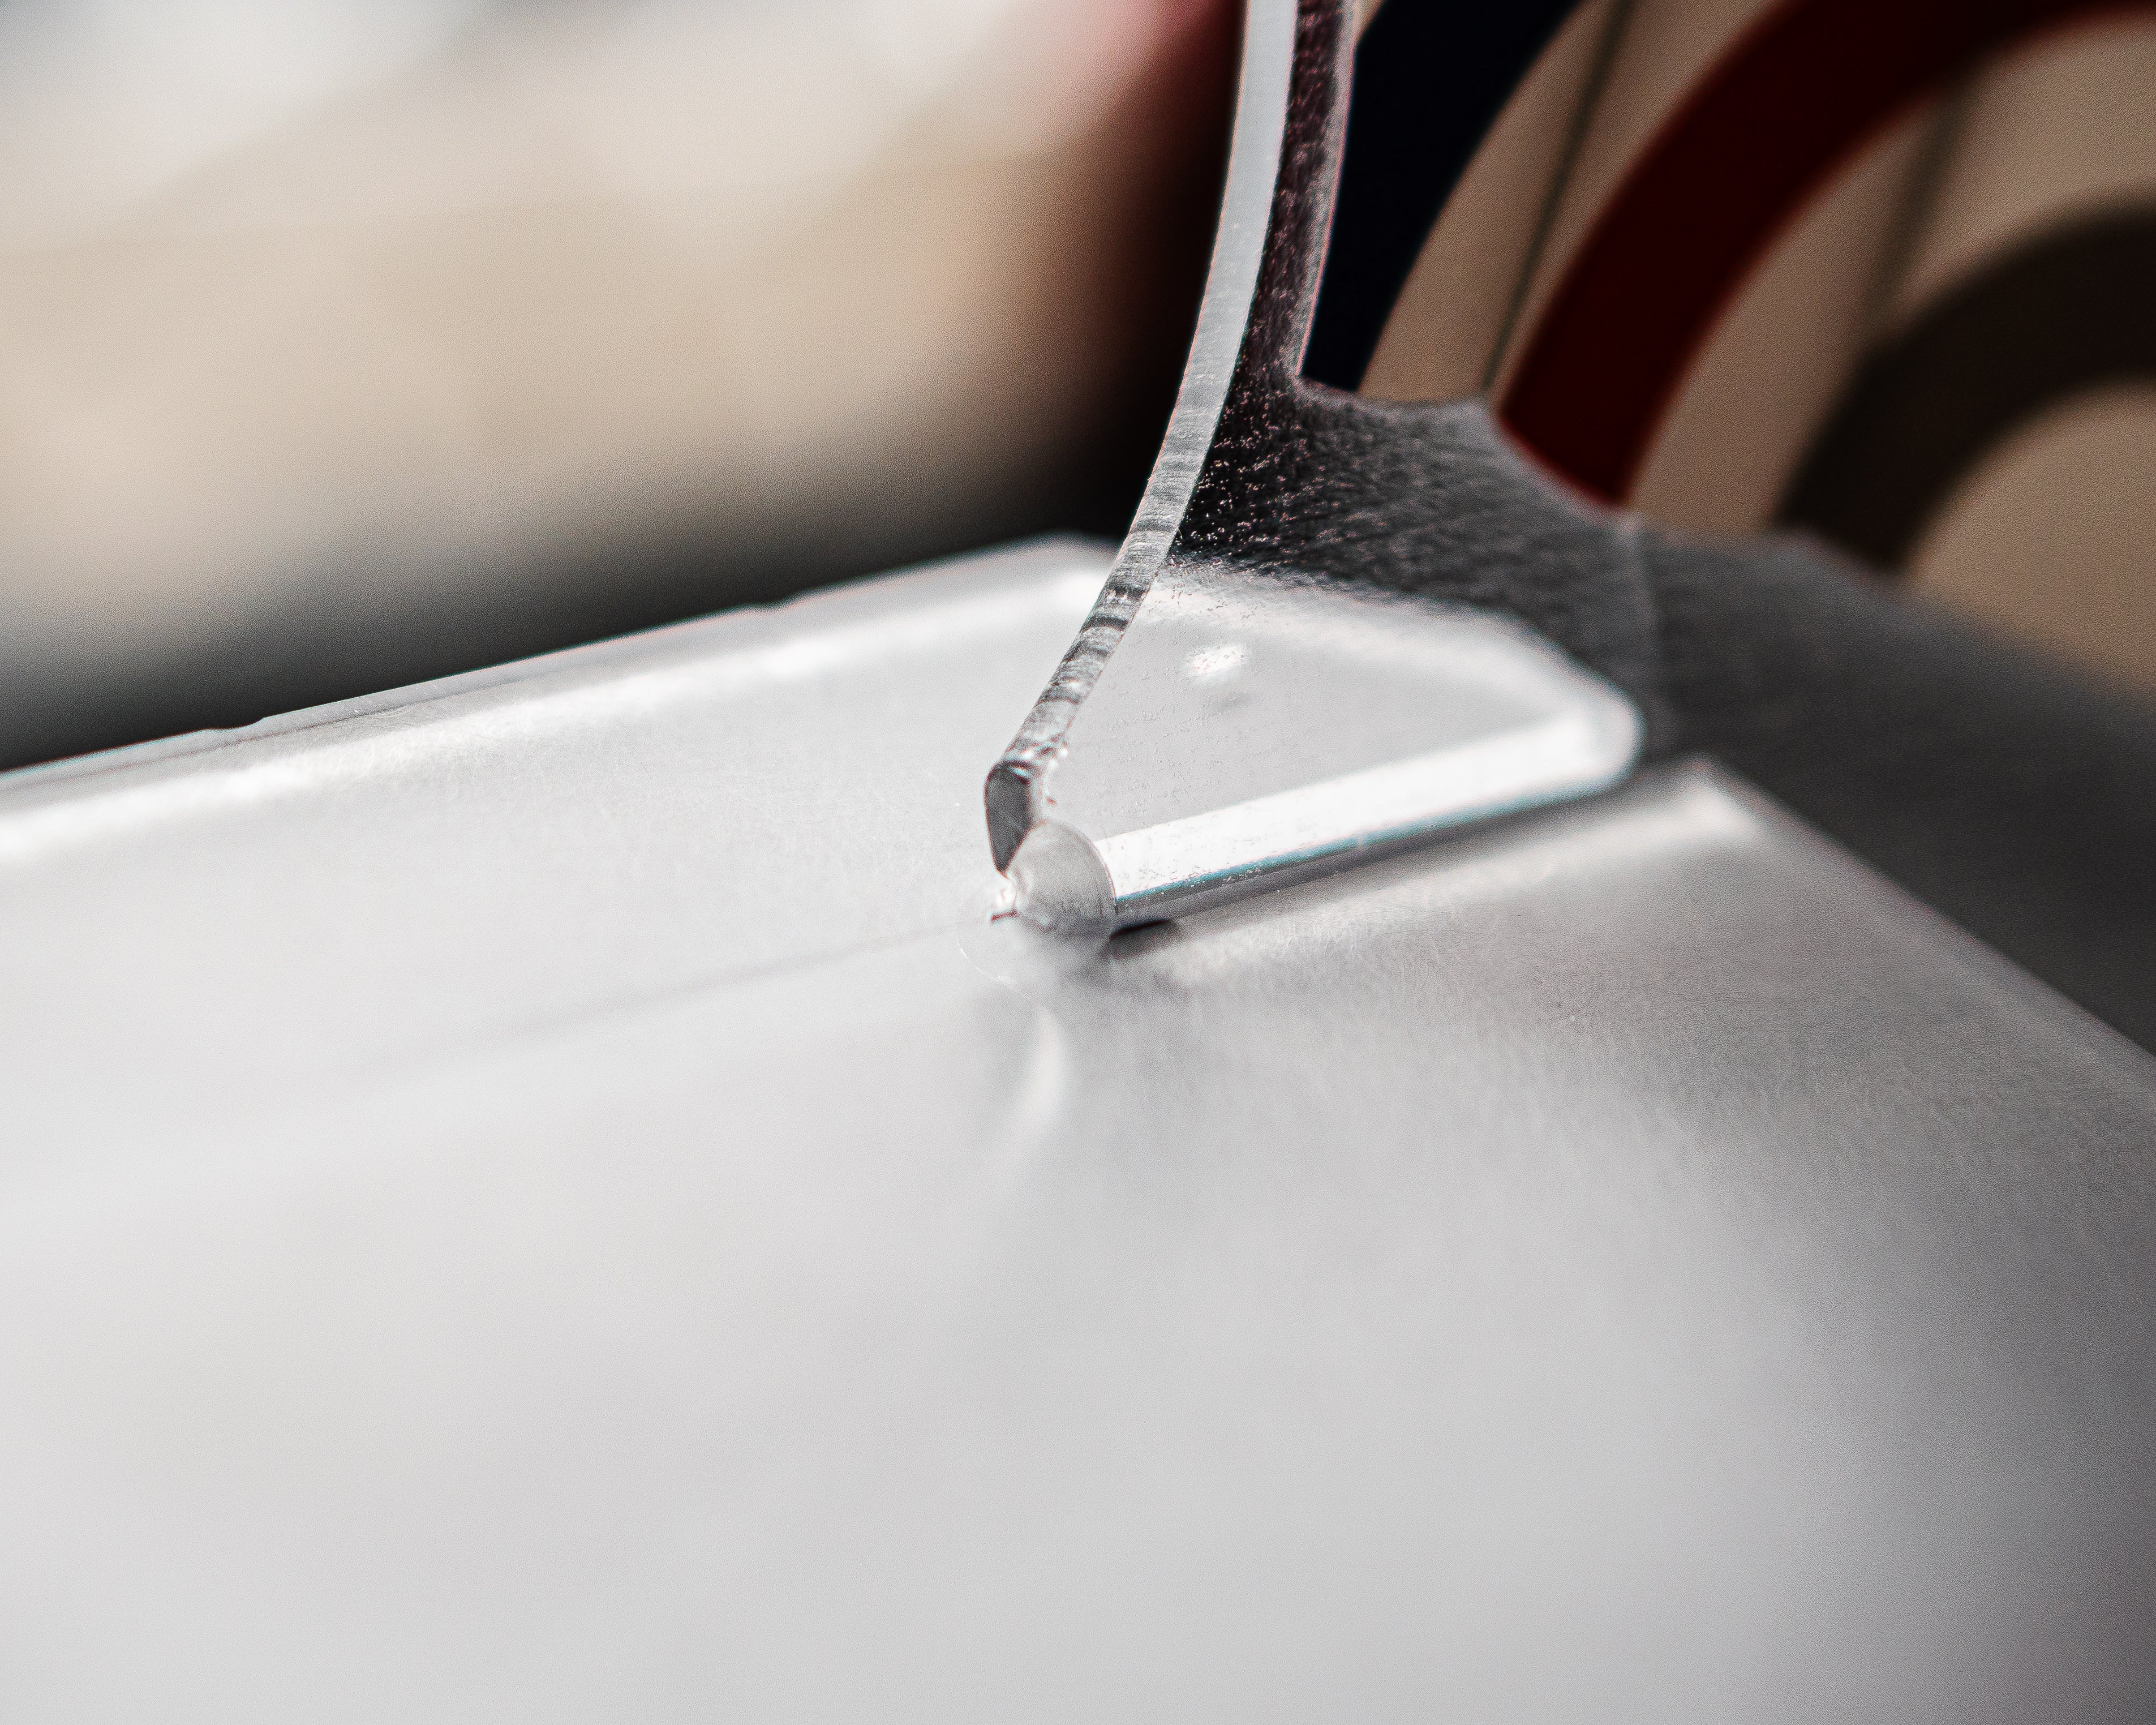
Verrouillez le jeu avec la goupille pour jouer!
Alignez les deux tubes rouges de façon à ce que leurs trous soient bien superposés. Insérez ensuite la goupille en métal à travers les trous alignés, comme montré sur l'image.
Insérez la goupille, puis tournez la bague pour la verrouiller en place. Cela empêchera les tubes de se séparer pendant l'utilisation. Assurez-vous que la bague est bien fixée avant de commencer à jouer.
Comment installer la rallonge
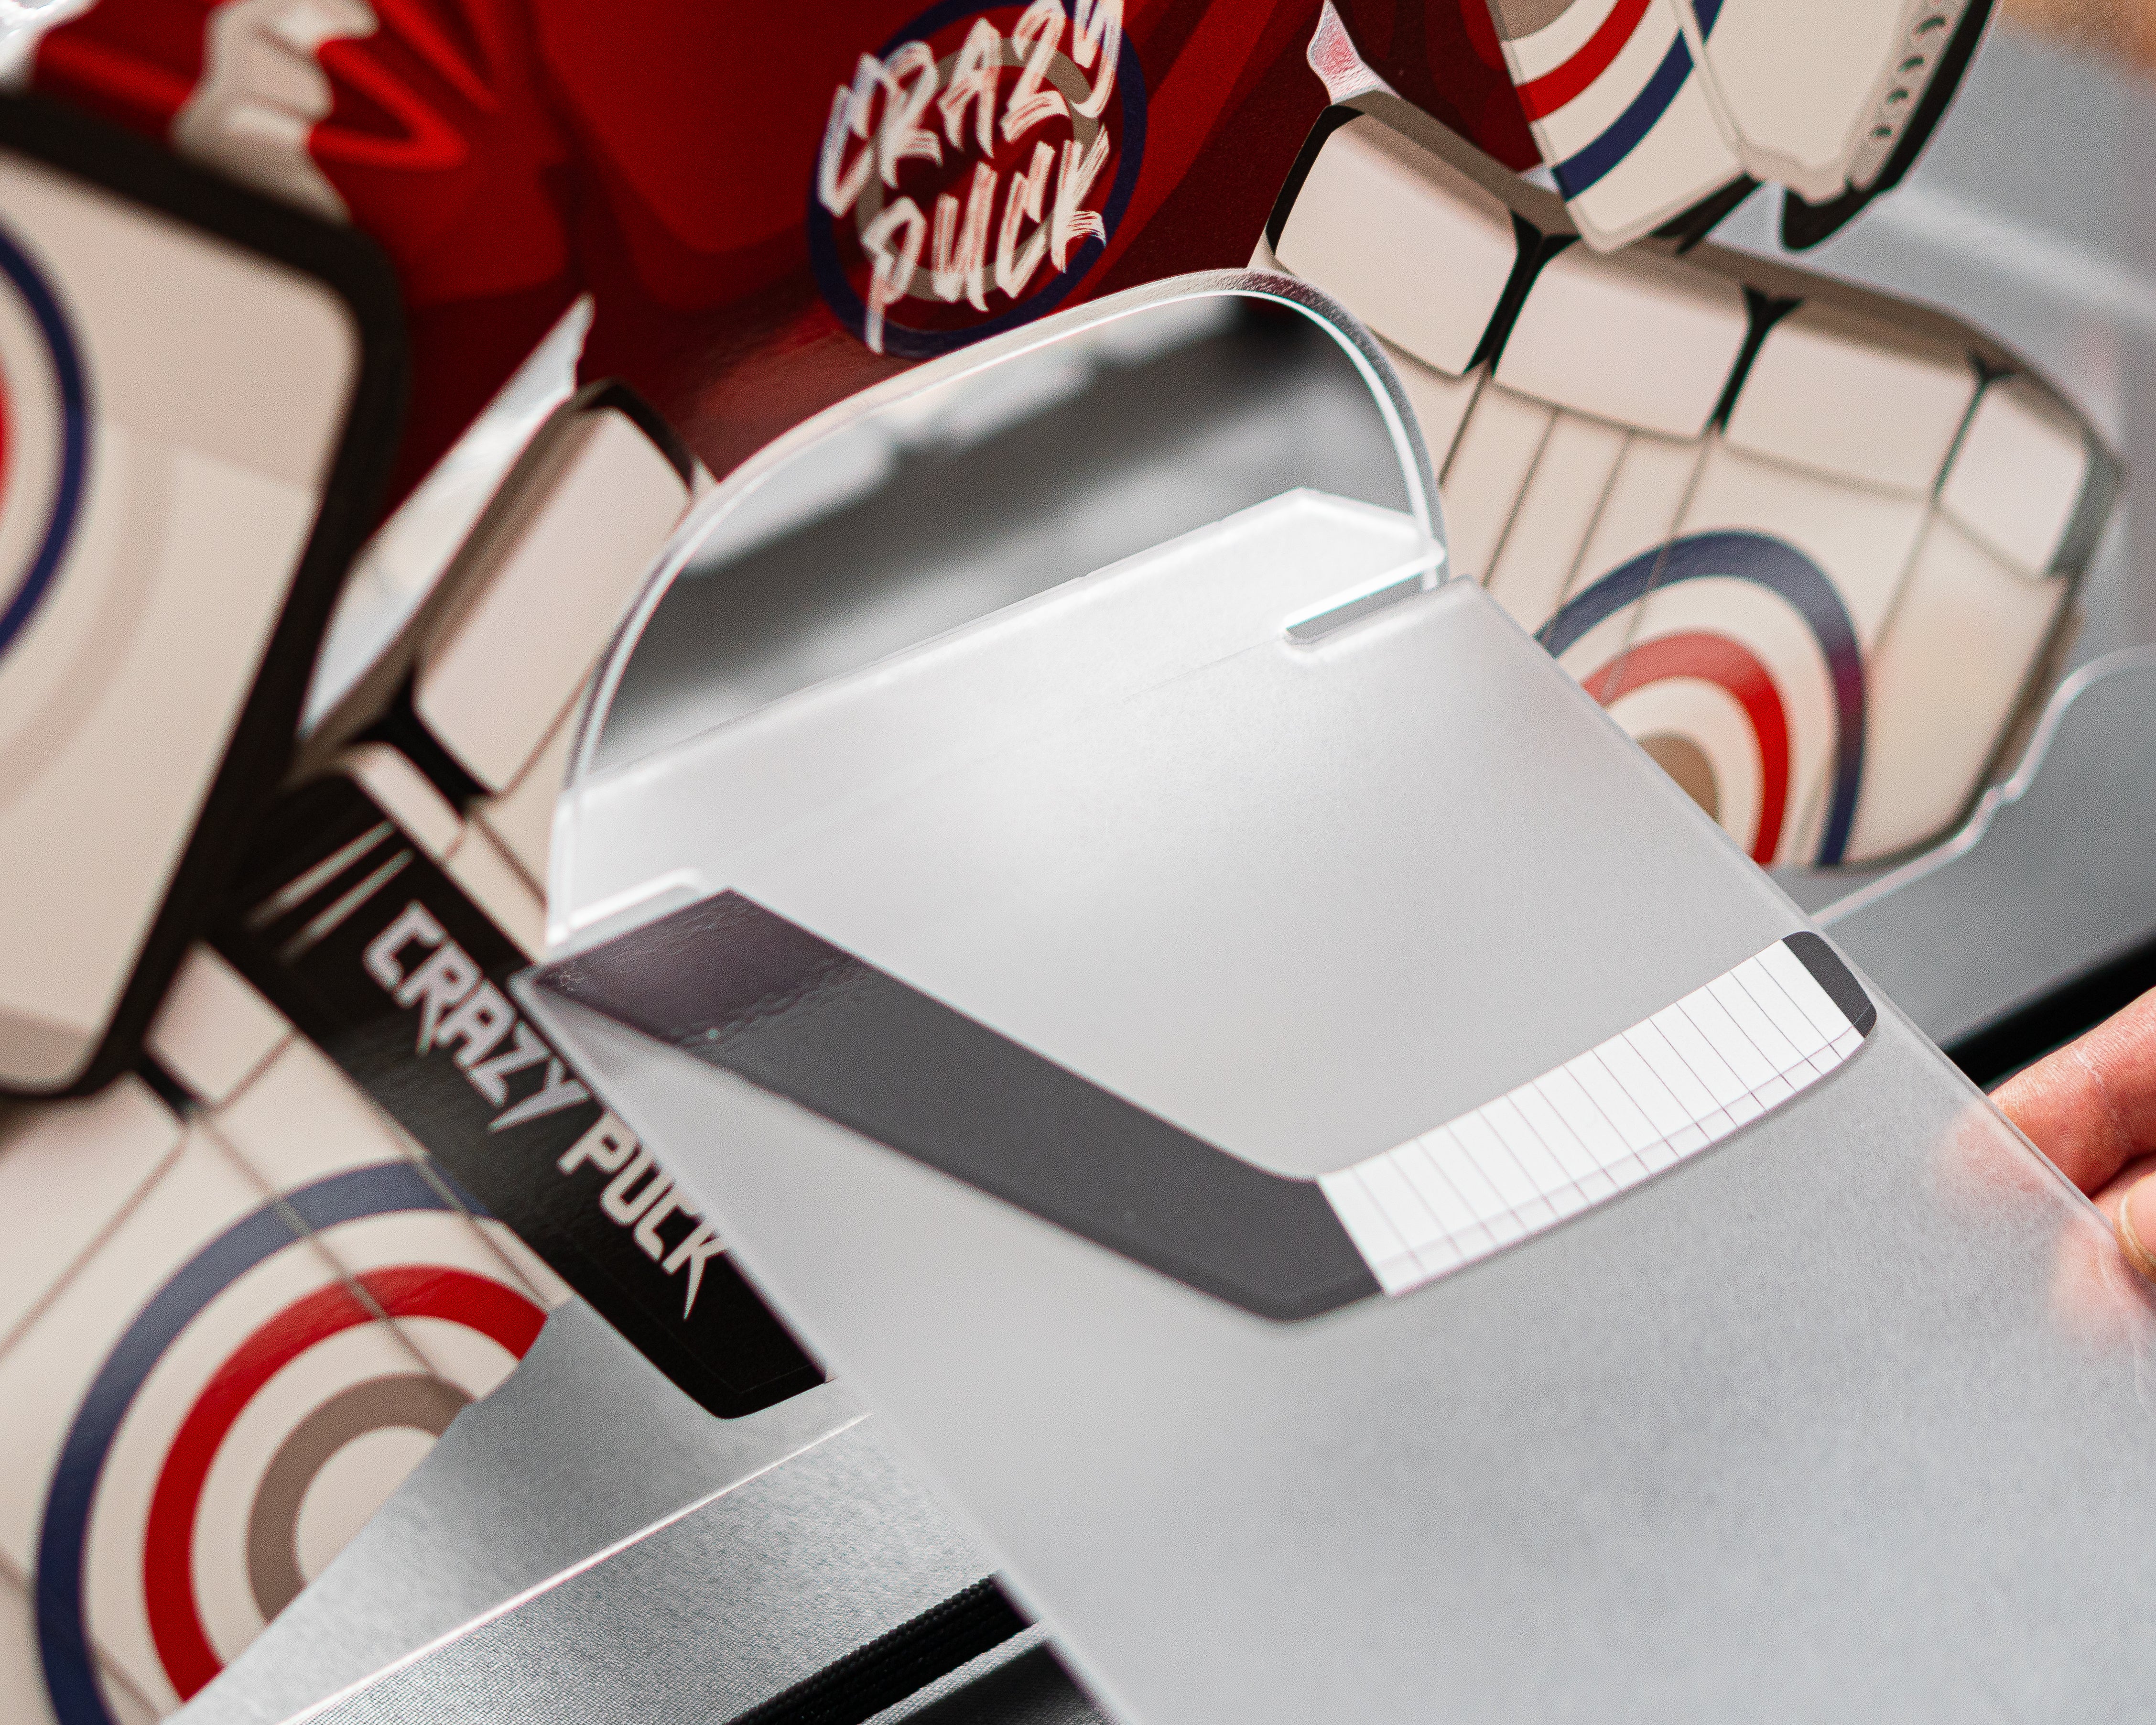
Préparation de la rallonge
Insérez la rallonge de bâton dans l’emplacement prévu, en alignant les bords avec la structure du support (voir image 1). Assurez-vous que la rallonge est bien centrée pour une meilleure stabilité.
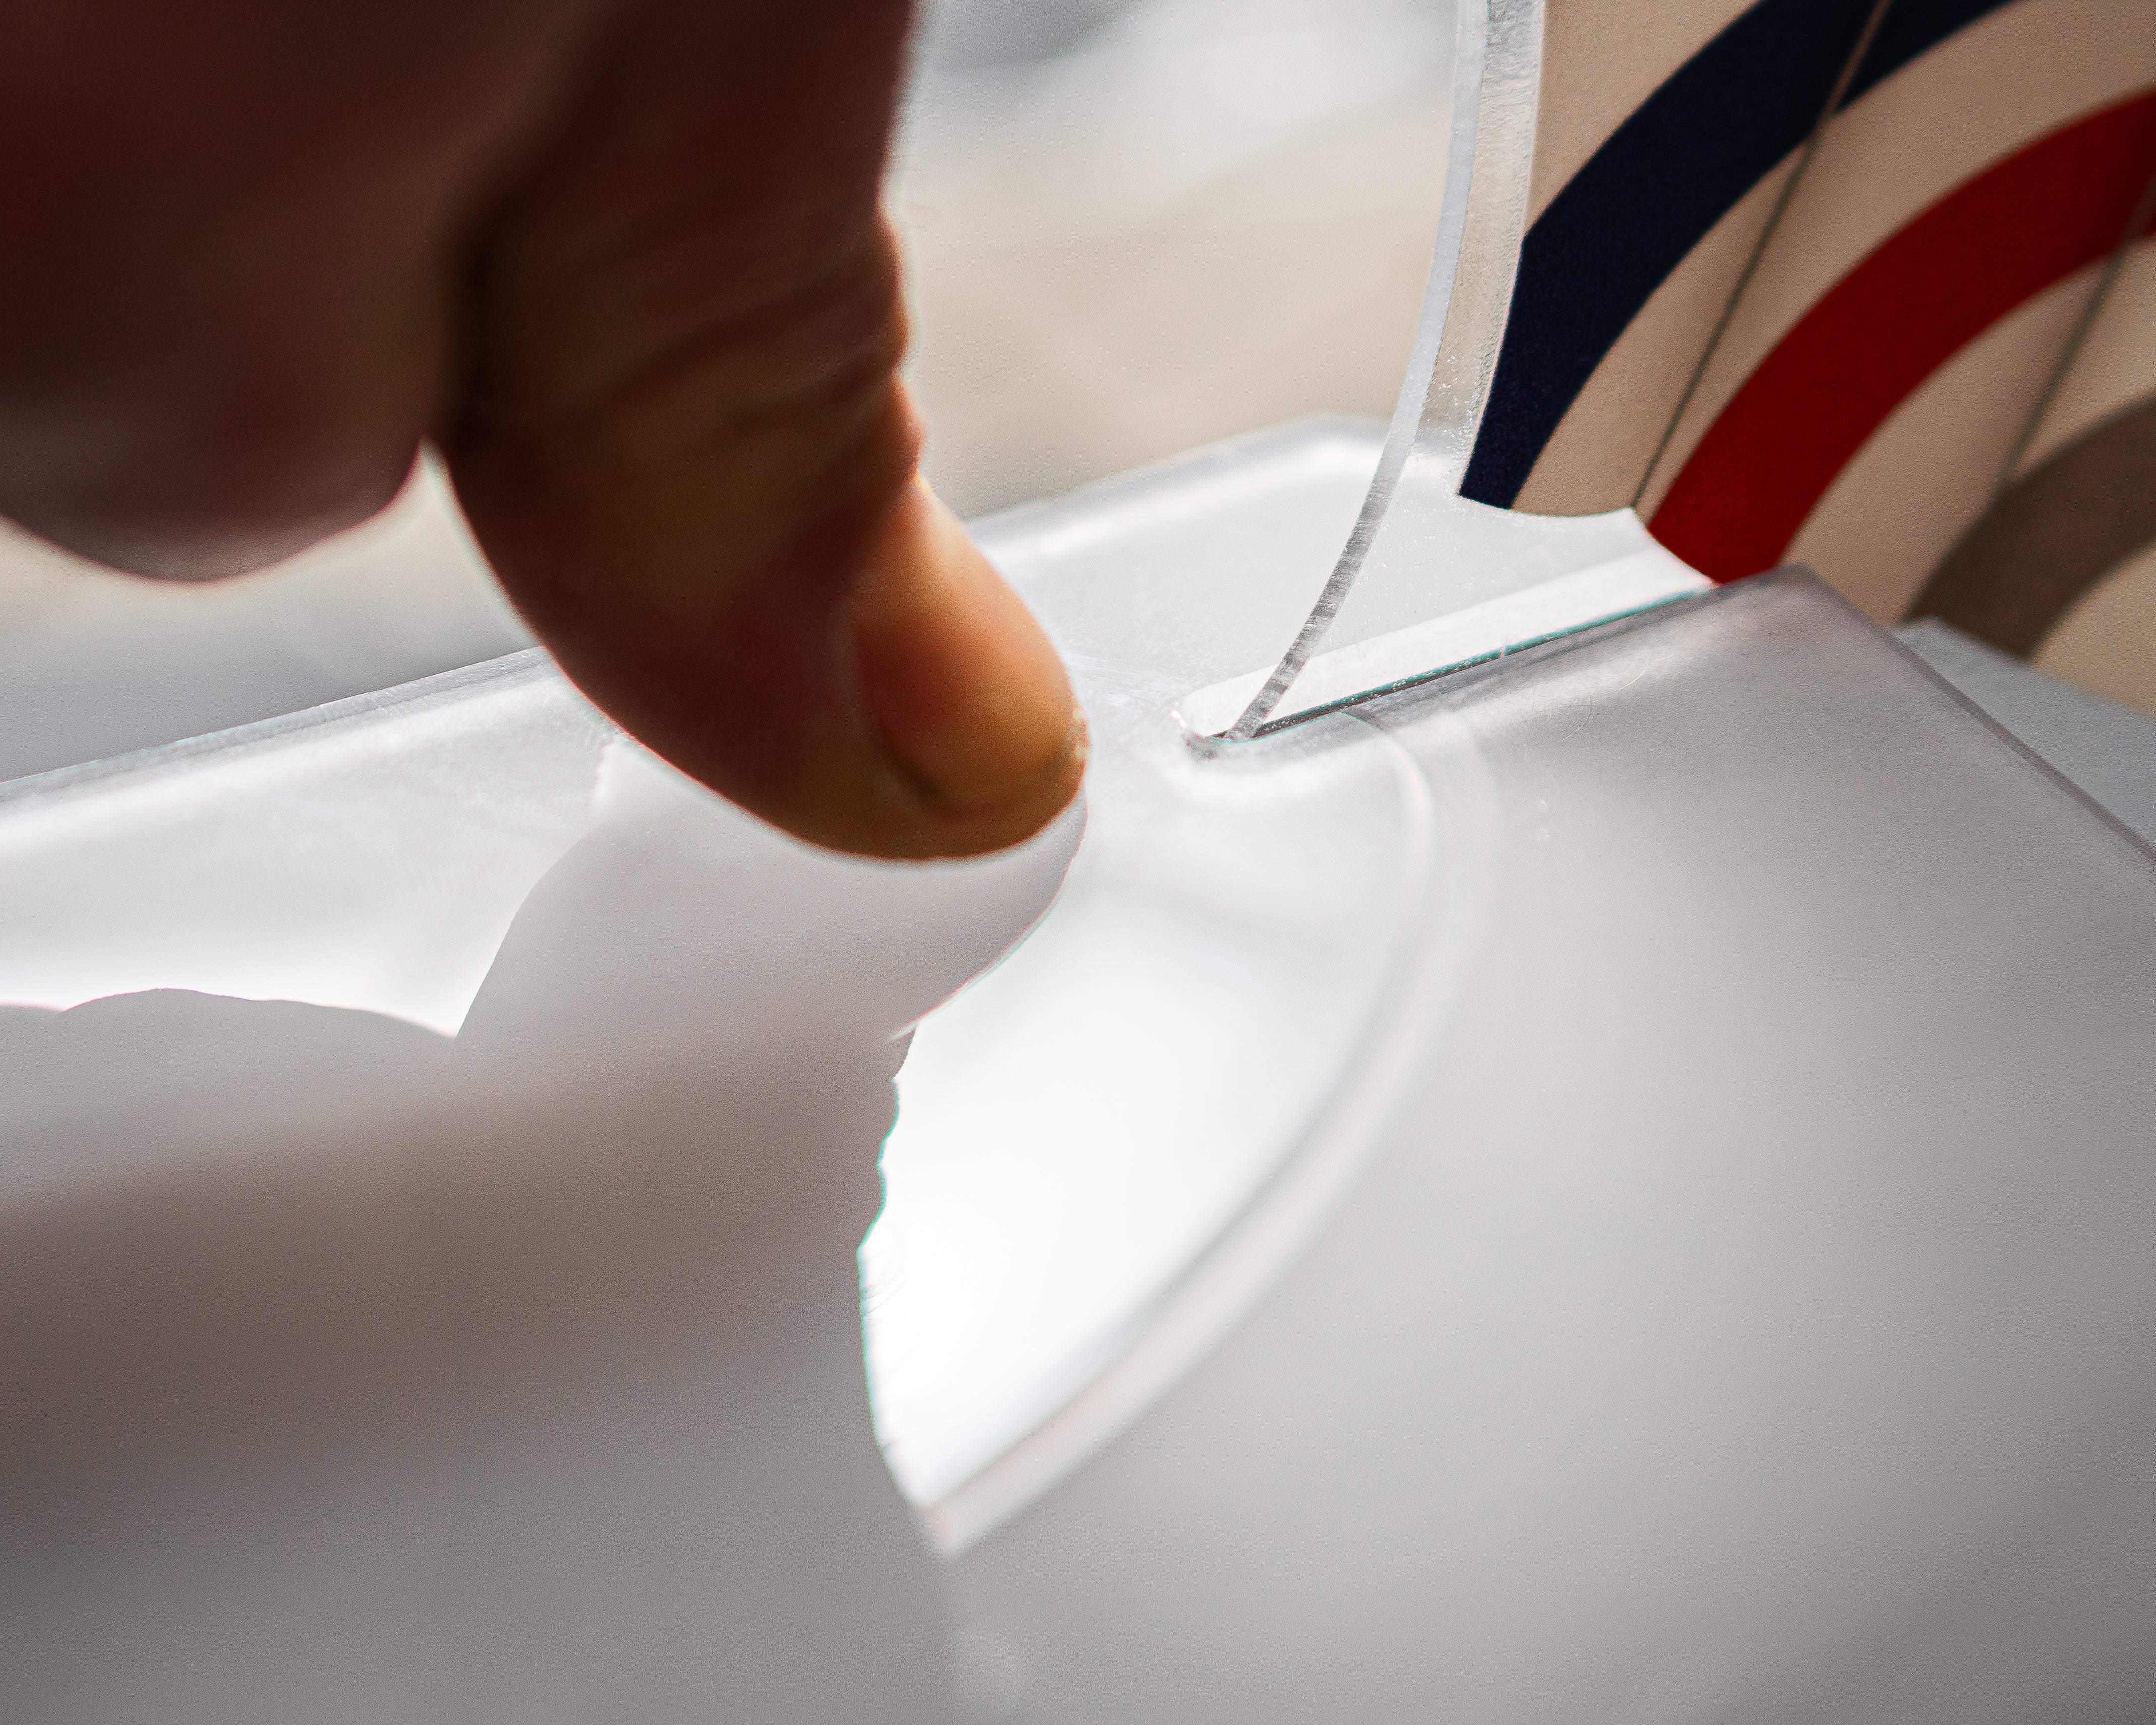
Fixation de la rallonge
Appuyez fermement sur le bord de la rallonge pour l’enclencher dans la fente prévue. Vous devriez entendre un léger "clic" ou sentir la rallonge se fixer (images 2 et 3). Cela permet de maintenir la rallonge en place.
Vérification de l'ajustement
Vérifiez que la rallonge est bien fixée et qu'elle ne bouge pas. La rallonge doit être stable et alignée avec le bâton pour assurer une utilisation optimale.
Installez la Lumière

Étape 1
Vissez le cap de plastique
Vissez le capuchon en plastique.
Attention important: ne pas visser le capuchon de travers, cela pourrait casser le plastique.
Alignez bien les rainures avant de visser.

Étape 2
Installer la pile
Placez la pile dans son logement, en respectant la polarité (+ et –).

Étape 3
Préparation des outils
Vous aurez besoin de ruban adhésif et des éléments dans l'image.

Étape 4
Préparer le capteur
Coupez un morceau de ruban adhésif d’environ 2,5 à 4 cm (1 à 1,5 po).
Enroulez le ruban autour du bâtonnet en plastique de la lumière, juste avant le capteur (sans recouvrir le capteur).

Étape 5
Insertion de la tige
Insérez ensuite la tige en plastique avec les fils dans le tissu du filet, en la faisant glisser du haut vers le bas.
Une fois la tige complètement passée, les fils seront bien cachés à l’intérieur du filet et la lumière sera en position d'être vissée au cadre.

Étape 6
Fixez la lumière
Positionnez la lumière en haut du cadre.
La vis devrait entrer du bas vers le haut.

Étape 7
Installation de la lumière sur le cadre
Fixez la lumière sur la structure en métal rouge, en utilisant un tournevis (comme montré dans les images). Vissez fermement pour éviter que l'unité ne bouge.